Thursday, November 20, 2008

Granola Bars

Confession: my camera has gone MIA. The picture I took with my iPhone was not blog worthy, but if you click on the recipe link below, mine look almost that good. The edges are more crumbly, but you get the idea. The last pictures I remember taking were in my house, so please send me good juju that I will find it soon.

Not Michael Landon is kind of obsessed with snacks, and they must have "substanance" (yes, spell check, I know this is not a word). This is very foreign to me, as someone who has been trying to loose weight since about seventh grade. Snacks are for curbing hunger, not providing energy. But what do I know.

These are yummy, and pretty easy. It's basically rice krispie treats, only with oat granola instead of rice krispies. They're also pretty big. I would recommend spreading it out in two pans if you've got them. They crumble a bit at the edges when cut.

First, we need granola.

Homemade Granola
: modified from Martha, makes 8 cups. Her receipe makes 6 1/2, but the bars call for 8, which is why the quantities are screwy. If you like granola cereal, just ignore the +s and make a double batch.

Ingredients
  • 1/2 cup + 2 tbsp shredded coconut
  • 5 cups old-fashioned rolled oats
  • 1/4 cup + 1 tbsp toasted wheat germ
  • 1/4 cup + 1 tbsp unsalted sunflower seeds
  • 1 1/4 cup coarsely chopped almonds (Not Michael Landon hates almonds, so I used some cashews I had lurking in the pantry; I didn't quite have enough, so I added some more sunflower seeds and this next ingredient)
  • 1/4 cup + 1 tbsp flax seed (my addition, it's good for you to boot - you're getting the idea this isn't like a baking recipe where everything has to be all precise, right?)
  • 1 tablespoon + 1 tsp sesame seeds
  • 1/2 teaspoon + a pinch ground cinnamon
  • 1/4 teaspoon + a smaller pinch freshly ground nutmeg
  • 1/2 cup + 2 tbsp honey
  • 8 tablespoons (1 stick) + 2 tbsp unsalted butter, melted
  • 1/2 cup + 2 tbsp (golden) raisins
Directions
  1. Heat oven to 350 degrees. Line a baking sheet with parchment, and spread shredded coconut on top. Bake until toasted. Transfer to a wire rack to cool. (My wheat germ was untoasted, so I toasted that here too, on the same sheet. Watch carefully, neither takes long.)
  2. Decrease oven temperature to 300 degrees. Line two baking sheets with parchment; set aside. In a large bowl, toss together oats, wheat germ, sunflower seeds, almonds, sesame seeds, cinnamon, and nutmeg. Set aside.
  3. In a small bowl, stir together honey and butter; pour over oat mixture. Stir well. Spread onto sheets. Bake until golden, about 25 minutes. Transfer to a wire rack to cool. Break up granola; sprinkle with raisins and toasted coconut. Store in airtight container.
Now onto the bars. The granola is all gummy when it comes out of the oven, so wait for it to cool first. You probably don't need to break it up too much by hand, the dumping in and stirring will take care of some of it.

Peanut Butter Granola Bars
: again, adapted from Martha, makes 16 sizeable squares

Ingredients
  • 4 tablespoons unsalted butter, plus more for pan
  • 10 1/2 ounces mini-marshmallows
  • 1/2 cup creamy peanut butter
  • 8 cups Homemade Granola
Directions
  1. Butter a 9-inch-square baking pan; set aside (I lined it with parchment paper instead). In a large saucepan over medium heat, melt butter. Add marshmallows; stir until melted, about 4 minutes. Remove from heat.
  2. Stir in peanut butter and granola until well combined (I stirred the peanut butter in first on its own; felt like it would mix throughout better that way). Transfer mixture to prepared pan. Dampen your hands, and press mixture into prepared pan, distributing mixture evenly. Set aside to cool. Invert pan, releasing bars. Cut into sixteen squares. Store in an airtight container up to 3 days.
I'm no food safety expert, but I always store stuff longer than directed, especially if it's not refrigerated or anything. I've had cookies that tasted fine weeks (months?) later, and I've never gotten sick. Well, only once, but I'm not certain that was my fault - I blame packaged lettuce.

Tuesday, November 18, 2008

Merry Christmas!

I love love love love Christmas. It's my favorite time of year by far. But when I said in my first post that I tend to take on too much - well, that kinda explodes at Christmas. I bake cookies, make a Christmas craft for 20, make my own Christmas cards, and make my own wrapping paper. On top of shopping for gifts, decorating my house to make it vomit Christmas, and attending five parties at a bare minimum (not including Christmas and Christmas Eve). Oh and I do still have to work during the month of December, which usually happens to be the busiest time of year. Also, I mostly do it all on my own, since Not Michael Landon usually has final exams late in December.

This year, we're hoping not to be in a little apartment anymore sometime soon, which could make it as crazy as the year I decided to get married in January.

The easiest way to tackle all this would be to do less. But I really like it all. So my first strategy is an attitude adjustment. I simply do not let myself get frustrated and worn out doing it all. I'm not doing it for anyone other than me, so if I'm not having a good time, there's no point. Usually a firm reminder that I'm doing this for fun does the trick, but theoretically I could stop. (I can stop anytime I want to... right?)

My second strategy is to start early. Which is the catalyst for such an annoying post title on November 18th. My Christmas card supplies are purchased and photos chosen, and almost all my Christmas cookie dough is in the freezer (one more half batch to go). I've gone through all my addresses and identified the ones I need to update. My goal is to be well on my way to done with the crafty stuff by Thanksgiving.

This kinda ties into my third strategy - planning. I have a memo booklet with lists for cards, cookies, crafts, gifts, and addresses for all, as well as what I've done the last several years to keep from repeating. I'm supposed to stick this in my purse so I can work on it whenever I have a chance, but I need to move it to my iPhone, probably via my Zenbe lists ap. I also drew up a week by week schedule for now through the holiday. It isn't set in stone or excessively detailed, but it lets me plan out when I need to start things, when I need to finish, and avoid having too much going on at once.

The weather is still so nice here it's hard to get into the mood, but it's all worth it in the end.

Here are the cookies I have sitting in my freezer, all courtesy Martha Stewart:

Gingerbread Snowflakes

These are so yummy and spicy and not overly sweet. There's something that just says Christmas about a cut-out cookie that you decorate, but I got kinda tired of plain old sugar. Martha wants you to make these giant snowflakes, but I just used the cutters I have - trees, snowflakes, and stockings. I cut them out, froze on a cookie sheet with parchment, and then transferred them to a plastic freezer bag.

Ingredients
  • 6 cups all-purpose flour, plus more for work surface
  • 1 teaspoon baking soda
  • 1/2 teaspoon baking powder
  • 1 cup (2 sticks) unsalted butter
  • 1 cup packed dark-brown sugar
  • 4 teaspoons ground ginger
  • 4 teaspoons ground cinnamon
  • 1 1/2 teaspoons ground cloves
  • 1 teaspoon finely ground pepper
  • 1 1/2 teaspoons coarse salt
  • 2 large eggs
  • 1 cup unsulfured molasses
  • Royal Icing
  • Fine sanding sugar, for sprinkling
Directions
  1. Sift together flour, baking soda, and baking powder into a large bowl. Set aside.
  2. Put butter and brown sugar in the bowl of an electric mixer fitted with the paddle attachment; mix on medium speed until fluffy. Mix in spices and salt, then eggs and molasses. Reduce speed to low. Add flour mixture; mix until just combined. Divide dough into thirds; wrap each in plastic. Refrigerate until cold, about 1 hour.
  3. Preheat oven to 350 degrees. Roll out dough on a lightly floured work surface to a 1/4-inch thick. Cut into snowflakes with a 7- inch snowflake-shape cookie cutter. Space 2 inches apart on baking sheets lined with parchment paper, and refrigerate until firm, about 15 minutes.
  4. Bake cookies until crisp but not dark, 12 to 14 minutes. Let cool on sheets on wire racks.
  5. Put icing in a pastry bag fitted with a small plain round tip (such as Ateco #7). Pipe designs on snowflakes; immediately sprinkle with sanding sugar. Let stand 5 minutes; tap off excess sugar. Let icing set completely at room temperature, about 1 hour. Store cookies between layers of parchment in an airtight container at room temperature up to 5 days.
Chocolate Crackles

We've made these in my family forever, although we call them crinkles. I think this recipe is a little better, but don't tell my mom. I rolled the dough into balls and froze on a cookie sheet and transferred to a plastic freezer bag. I'll roll them in the sugar before I bake them off. Cross your fingers the sugar sticks.

Ingredients

Makes about 4 dozen

  • 8 ounces bittersweet chocolate, melted and cooled
  • 1 1/4 cups all-purpose flour
  • 1/2 cup Dutch cocoa powder
  • 2 teaspoons baking powder
  • 1/4 teaspoon salt
  • 8 tablespoons (1 stick) unsalted butter, room temperature
  • 1 1/3 cups light-brown sugar, firmly packed
  • 2 large eggs
  • 1 teaspoon pure vanilla extract
  • 1/3 cup milk
  • 1 cup confectioners' sugar, plus more for rolling
Directions
  1. Heat oven to 350 degrees. Chop bittersweet chocolate into small bits, and melt over medium heat in a heat-proof bowl or the top of a double boiler set over a pan of simmering water. Set aside to cool. Sift together flour, cocoa, baking powder, and salt.
  2. In the bowl of a heavy-duty electric mixer fitted with the paddle attachment, beat butter and light-brown sugar until light and fluffy. Add eggs and vanilla, and beat until well combined. Add melted chocolate. With mixer on low speed, alternate adding dry ingredients and milk until just combined. Divide the dough into quarters, wrap with plastic wrap, and chill in the refrigerator until firm, about 2 hours.
  3. On a clean countertop, roll each portion of dough into a log approximately 16 inches long and 1 inch in diameter, using confectioners’ sugar to prevent sticking. Wrap logs in plastic wrap, and transfer to a baking sheet. Chill for 30 minutes. Cut each log into 1-inch pieces, and toss in confectioners’ sugar, a few at a time. Using your hands, roll the pieces into a ball shape. If any of the cocoa-colored dough is visible, roll dough in confectioners’ sugar again to coat completely. Place the cookies 2 inches apart on a Silpat-lined baking sheet. Bake until cookies have flattened and the sugar splits, 12 to15 minutes.
  4. Transfer from oven to a wire rack to let cool completely. Store in an airtight container for up to 1 week.


Pine Nut Cookies
These are new for me, but the dough was pretty yummy and really simple even though I had to cut the egg in half to make it in two batches since I only have a small food processor. I couldn't get the pine nuts to stick very well, so I froze them w/o since they would just come off in the bag. Wish me luck that they stick better when I bake them off.

Ingredients

Makes about 3 dozen

  • 2 cups pine nuts
  • 1 cup confectioners' sugar
  • 1/4 cup almond paste
  • 1 teaspoon pure vanilla extract
  • 1 large egg
  • 1/2 cup all-purpose flour
  • 1/4 teaspoon baking powder
  • 1/4 teaspoon salt
Directions
  1. Preheat oven to 350 degrees. Process 3/4 cup pine nuts, the sugar, almond paste, and vanilla in a food processor until fine crumbs form. Add egg; pulse to combine. Add flour, baking powder, and salt; process just until dough comes together.
  2. Roll dough into 3/4-inch balls. Roll balls in remaining 11/4 cups pine nuts, gently pressing to coat. Space 2 inches apart on parchment-lined baking sheets.
  3. Bake until cookies begin to turn golden brown, about 20 minutes. Let cool completely on sheets on wire racks.

Friday, October 17, 2008

Microwaveables

A general strategy I try to follow in all aspects of my life is simply to simplify. I don't blow dry my hair, I've canceled all my magazine subscriptions, and I clean most my house with only vinegar. With few exceptions, this saves my pocketbook, the environment, my health, and my sanity in one way or another. This is certainly true of microwaving non-microwaveable oatmeal and popcorn.

Oatmeal

Oatmeal is a fantastic breakfast. It's good for your cholesterol, it's filling, and with enough milk and fruit, it's a great balanced meal to start the day. It's also super easy and quick to prepare from almost nothing.

I am the world's least morning person and yet I roll out of bed every morning and feed Not Michael Landon, so I need things simple (I'm prone to temper tantrums when things don't go my way before coffee. I'm not kidding.). I have a drawer outfitted with all necessary oatmeal supplies and I cook both our bowls at the same time.

Instant non-instant oatmeal

Ingredients:
1/2 c rolled oats
1/2 c plus a splash water
Suggested flavorings and toppings, optional: cinnamon, brown sugar, maple sugar, honey, sliced fruit, berries, milk.

Directions:
1. In a cereal bowl, combine rolled oats and water (no mixing required, just give the bowl a little jiggle).
2. Microwave for 1:15.
3. Remove and stir - be careful, the bowl can be really hot.
4. Microwave for another 1:15.
5. Stir again and serve.

You can add flavorings whenever suits you. Try it out and see what you like best as there will be slight taste differences if you cook the flavorings with the oatmeal, especially with milk and fruit. Also experiment with the amount of water you add, cooking time, and serving size. Oatmeal consistency is a highly personal preference, so use this as a guide to see what works for you.

Cost comparison:
Premium instant: Quaker Hot Cereal Oatmeal, $0.47 per 1.5oz packet.
Store brand instant: Safeway brand Hot Cereal Oatmeal, $0.30 per 1.5oz packet.
Bulk non-instant: Safeway brand Hot Cereal Quick Oatmeal (42oz container), $0.13 per 1.5oz serving size.
Savings: up to $0.34/serving minus cost of flavorings
Additional benefits: your oatmeal won't be stuffed with fillers and artificial sweeteners and HFCS like the store-bought packets. Also, there's always oatmeal on hand if you get a hankerin' for oatmeal chocolate chip cookies.

If you're still really sold on the ready-to-go packets (though adding a few flavorings is no big deal - it does not induce temper tantrums), you can dole out a serving of oatmeal and its flavorings into individual baggies beforehand. You have to like your sugars cooked with the oatmeal, and promise me you'll reuse the baggies.

Popcorn

On to the fun stuff. As long as you don't add too much fat, popcorn is a very healthful snack. 31 calories for a whole cup! And super filling - it's basically fiber and air.

Brownbag Popcorn
adapted from Instructables

Ingredients:
1/4 c loose popcorn kernels
canola oil spray, optional
salt, optional

Directions:
1. Take a brown paper bag, open the bag, and pour in your serving of loose kernels.
2. Fold over the flaps like the standard brown bag lunch at least three times, small folds are better.
3. Microwave until the popping slows to about once every 2-3 seconds. This is 2 minutes on my relatively new unit.
4. I flavor with a couple sprays of canola oil and a few pinches of salt. You can use other sprays, a little butter, or those flavor shakers. I tried Parmesan cheese once, which clumped into a ball, but it could probably work if you're careful.

Cost comparison:
Premium microwaveable: Orville Redenbachers Smart Pop Mini Bags, $0.50/bag
Store brand microwaveable: Safeway brand fun size microwaveable popcorn, $0.47/bag
Bulk: Safeway brand popcorn kernels, $0.09/serving, plus Safeway brand brown paper lunch bags, $0.02/bag
Savings: up to $0.40/serving
Additional benefits: no risk of popcorn lung

Wednesday, October 15, 2008

Blog Action Day: Poverty and Slow Food

Welcome to the second annual Blog Action Day. Today I'm joining with bagillions of other bloggers on the planet to bring focus to poverty. I feel like such an insider on my, like, fifth post.

Not Momma Ingalls (my mom) often chides me about the expense of our way of food. Being raised in a family of eight and then raising me on her own, getting the most food for the least money is bred deep in her blood. Sometimes I can see the unit price calculator behind her eyes if I look close.

It was bred in me too, of course. And then one day I was shopping at Target. Not Michael Landon wanted some granola bars. The Target brand was $1.50 cheaper than organic - almost half the price. As I stood in that aisle contemplating my choices, my desire for environmentally friendly food locked in a tug-o-war with my genetic need for frugality, some storage box thingy caught my eye. It was turqoise, it would look so cute in my living room, and it was only $14.99.

"Only $14.99". And here I am having a come-to-Jesus moment over $1.50 for granola bars. Since that day, our food budget has increased. But we're spending less. We eat out less, we stay home more, we buy less processed foods, and yes, we spend some more on meat and dairy. If I could live without ESPN, we'd cut cable. If we were really hurting, we could cut the cell phones and internet - between all these communications bills we could probably feed another family on top of ours.

As a percentage of the household budget, Americans are spending on food half of what we did in 1960, and half of what we are still spending is spent on food outside the home. So when someone says they don't eat local, organic food because they can't afford it, the first question should be what else are they spending money on?

But the dollar bill barriers to the slow food movement are much more complicated than all that. There are truly hungry people in the US and around the world who cannot afford rising grain prices, much less an heirloom tomato.

In the most recent Times Magazine, Michael Pollan writes a fantastic letter to our new president-elect (whoever he may be) about food policy. It sticks its fingers in all kinds of issues, including poverty. The long article is definitely worth a read when you have the time, but this excerpt relates directly to the topic at hand:

Farmer in Chief
By Michael Pollan

It will be argued that sun-food agriculture will generally yield less food than fossil-fuel agriculture. This is debatable. The key question you must be prepared to answer is simply this: Can the sort of sustainable agriculture you’re proposing feed the world?

There are a couple of ways to answer this question. The simplest and most honest answer is that we don’t know, because we haven’t tried. But in the same way we now need to learn how to run an industrial economy without cheap fossil fuel, we have no choice but to find out whether sustainable agriculture can produce enough food. The fact is, during the past century, our agricultural research has been directed toward the goal of maximizing production with the help of fossil fuel. There is no reason to think that bringing the same sort of resources to the development of more complex, sun-based agricultural systems wouldn’t produce comparable yields. Today’s organic farmers, operating for the most part without benefit of public investment in research, routinely achieve 80 to 100 percent of conventional yields in grain and, in drought years, frequently exceed conventional yields. (This is because organic soils better retain moisture.) Assuming no further improvement, could the world — with a population expected to peak at 10 billion — survive on these yields?

First, bear in mind that the average yield of world agriculture today is substantially lower than that of modern sustainable farming. According to a recent University of Michigan study, merely bringing international yields up to today’s organic levels could increase the world’s food supply by 50 percent.

The second point to bear in mind is that yield isn’t everything — and growing high-yield commodities is not quite the same thing as growing food. Much of what we’re growing today is not directly eaten as food but processed into low-quality calories of fat and sugar. As the world epidemic of diet-related chronic disease has demonstrated, the sheer quantity of calories that a food system produces improves health only up to a point, but after that, quality and diversity are probably more important. We can expect that a food system that produces somewhat less food but of a higher quality will produce healthier populations.

The final point to consider is that 40 percent of the world’s grain output today is fed to animals; 11 percent of the world’s corn and soybean crop is fed to cars and trucks, in the form of biofuels. Provided the developed world can cut its consumption of grain-based animal protein and ethanol, there should be plenty of food for everyone — however we choose to grow it.

In fact, well-designed polyculture systems, incorporating not just grains but vegetables and animals, can produce more food per acre than conventional monocultures, and food of a much higher nutritional value. But this kind of farming is complicated and needs many more hands on the land to make it work. Farming without fossil fuels — performing complex rotations of plants and animals and managing pests without petrochemicals — is labor intensive and takes more skill than merely “driving and spraying,” which is how corn-belt farmers describe what they do for a living.

To grow sufficient amounts of food using sunlight will require more people growing food — millions more. This suggests that sustainable agriculture will be easier to implement in the developing world, where large rural populations remain, than in the West, where they don’t. But what about here in America, where we have only about two million farmers left to feed a population of 300 million? And where farmland is being lost to development at the rate of 2,880 acres a day? Post-oil agriculture will need a lot more people engaged in food production — as farmers and probably also as gardeners.

The revival of farming in America, which of course draws on the abiding cultural power of our agrarian heritage, will pay many political and economic dividends. It will lead to robust economic renewal in the countryside. And it will generate tens of millions of new “green jobs,” which is precisely how we need to begin thinking of skilled solar farming: as a vital sector of the 21st-century post-fossil-fuel economy.

Here are some more articles from various sources on the subject of organic food and poverty:
Ten Reasons Why GE Foods Will Not Feed the World
Can organic farming feed the world?
Organic farming can 'feed the world'
THE MYTH: Industrial agriculture will feed the world.
GM-Free Organic Agriculture to Feed the World

Monday, October 13, 2008

Cockadoodledoo

I butchered my own chicken the other day. I didn't take pictures - I know you're disappointed. I normally buy Rosie organic chickens and have my butcher cut them up for me, because Not Michael Landon hates carving chickens and I'm not much good at it myself. But I have a strange aversion to asking people anything or for anything (I made it through my Bachelor's degree without attending a single office hour), and we've been buying lots of chicken lately, so this particular chicken I just couldn't bring myself to have them cut up.

Joy had fairly easy-to-follow instructions, starting with the wings, then the legs and thighs, and finally the back and breasts. It wasn't super pretty, but it wasn't hacked to heck either. I handled it mostly with a cheese knife and really only needed kitchen shears to cut through the ribs. The joints popped out quite easily.

When I was a kid, my mom would roast a whole young chicken all. the. time. She would coat the top of the breast in butter and garlic salt and it would come out all crispy and scrumptious. We would race each other to the oven when it was done to get to the crispy skin first. Not Michael Landon's family would barbeque chicken three or four nights a week in the summer. Chicken done the same way over and over can get boring, crispy skin and barbeque sauce notwithstanding. I grill it on our George Forman grill most the time. I can throw on thighs and legs for dinner that night, and throw on the breasts to keep as leftovers while we're eating.

Here are some things we like to do with leftover chicken, stay tuned for recipes:
  • Chicken tacos with homemade salsa
  • Chicken tortilla casserole (the sole casserole in my repetoire, a family favorite)
  • "Kitchen sink" salad (as in, everything but the)
  • Pasta with balsamic vinegrette and chicken

Thursday, October 9, 2008

Fresh Pasta

I looooove pasta. Atkins never convinced me otherwise. I reject the idea that there's anything fundamentally wrong healthwise with a food that's been a part of so many cultures as long as pasta has. We usually eat it at least once a week. It cooks up quickly and makes lots of leftovers for lunches. It's also yummy without meat, which makes it more economical and better for the environment.

I actually don't have any major qualms with pasta from the grocery store. I can get organic whole wheat pasta from Trader Joe's for $0.99/lb. That's tough to beat, and I keep lots of different shapes in my pantry at all times. Italians don't have the same hang up that we Americans do about fresh vs. dried pasta. It's just different kinds, each with their own pros and cons.

I saw Jaime Oliver make fresh pasta and sauce from scratch on Food Network in 10 minutes flat and thought this was something I could tackle. Of course, it took me significantly longer than Jaime, but who really thought I was as awesome as him?

If you've been paying attention, you'll suspect I got the recipe from Joy, and you'd be right. It's insanely simple - 2 cups flour, 3 eggs. You can mix it in a food processor or stand mixer, but by hand is the traditional way. Just pile the flour, make a well in the center, and crack the eggs inside. The first time I tried this, I used my built-in cutting board and dripped floury egg onto the flour, but you're smarter than me, so you'll know to start out with a level surface. On try #2 I used our big wooden cutting board with the lip around the edge. That's right, I'm a college gradumate.

From here you just start mixing the flour in with the eggs bit by bit, being careful not to break the well. It starts out slow and precarious, but soon enough it gets viscous enough that it won't run off on you, and you can start pulling the sides of the well in too. Unless it's raining outside or you're in high altitude or something, don't mess with the ratios. It will look alternately too wet and too dry at various points. Just keep mixing and then kneading.

Kneading is fun; it's mindlessly monotonous and gets your frustrations out on flour instead of your husband. You know that great feeling when you turn your brain off and stare until your vision blurs? You can do that while kneading. The heat from your hands will loosen up the dough a bit so it gets more wet and can take on the rest of the flour floating around on your board. When it's all incorporated and homogeneous and your mental state is sufficient, you can quit.

After this comes "resting". It's supposed to redistribute the flavors, and probably helps the texture. Cut the dough ball in four pieces first and turn a bowl over on top of them on the counter to keep them moist. Joy recommends at least an hour.

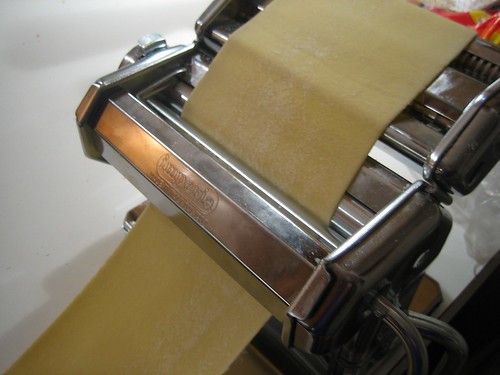
Now we're ready to roll. If you're adventurous and have the space, you can do this with a rolling pin. There's also attachments for Kitchen Aid mixers that cost an arm and a leg (Joy approves the rollers, but sticks its nose up at extruders). I picked up a hand-crank pasta roller at Bed Bath and Beyond for $35.00. On first try I rolled it all the way to the thinnest setting. I'm not sure exactly what this setting is for, but yummy fettuccine isn't it. Number 3 (3rd thinnest of 7) worked perfectly. I roll the dough through three times on each setting, folding in half after each pass through. Keep the dough lightly floured; it doesn't seem like it needs it, but it will pull and shred eventually, and that's no fun. Keep the remaining dough balls under their bowl, and don't try to multitask during this step to keep the dough from drying out.

My roller has two cutters: one for fettuccine and one for spaghetti. Again here you can go low-tech: just fold the pasta in half loosely several times, and then cut into strips for a more rustic feel. The picture at top is my pasta drying on my $13 wooden drying rack. Once again, not a necessity, but it was cheap and it comes apart easily for storage. Drying for another hour or so is recommended by Joy. This recipe makes about two servings for us, so we dried the other half all the way overnight and put it in a plastic baggie in the pantry for later (careful - it's brittle).

Be sure to keep the lid on while boiling water to save time and energy. After drying for about an hour and a half, this pasta was cooked in about 4 minutes. I checked every 30 seconds - one minute, it's way faster than dried (the home-dried pasta also cooked quicker than store bought). A quick canned tomato sauce, and dinner is served.

So not nearly as quick as Jaime, mostly due to the hand-mixing, resting the dough, and drying. Since he didn't do any of these, I doubt their necessity. It's a rough day when I have to decide whether to follow Jaime or Joy, but pasta making isn't a bad way to spend a Sunday in between other tasks.

Thursday, October 2, 2008

Fish en Papillote

I'm so fancy. ish.

I've been really trying to eat more fish lately. You know, health and all. Plus, it can be a sustainable part of your diet, as long as you follow guidelines like these provided by Monterey Bay Aquarium. Every time I'm there I pick up their latest Seafood Watch guide and keep it in my wallet so I know what to stay away from at the store. The problem with these guidelines is it's not as cut and dry as "this fish is good, this fish is bad". It's more like "this fish caught here, in this way, is usually good". This is where it comes in handy to get your fish from an actual person behind a counter, of whom you can ask questions. Of course, I'm unexplicably shy about things like that, but my market always notes the region as well as whether the fish is wild or farmed.

If you're not getting it by now, the fact that I'm imperfect is kind of the whole point of this blog, and here I've failed once again. I've been buying pacific red snapper because rockfish (its other name) was listed as "best" or "good" on my pocket guide. Now that I've gone and found the full list for my faithful reader(s?), it's looking more like "avoid". Whadya know, my blog teaches me things too.

Cooking fish is great, not because it tastes particularly wonderful, but because it's so quick. A thin fillet like snapper cooks through in no time flat. I usually throw it on the stove with some olive oil, salt and pepper, my standard for just about any food. This particular day, a coworker had given me some homegrown cherry tomatoes and they sounded really good with fish, but really moist fish. No dried out edges.

Martha Stewart is obsessed with cooking en papillote and seems to think this is a normal staple of cooking. I think she's insane, but it popped into my head as a way to keep the fish moist. In case you're not Martha, en papillote basically means baked in a pocket of parchment paper. I opened up Joy, 'cause this is just the kind of technique a reference like that is best at, and got crackin'.

Joy insists on lots of moisture inside the packet, so I added about a tablespoon each of butter and olive oil. There was lots and lots of liquid swimming around the fish once it was done, so I could probably cut back on this. Then I just diced up a quarter onion and some garlic and halved the cherry tomatoes, and threw them on top with s&p. Joy had me cut the parchment in a heart shape and fold it closed in a kinda funny overlap way. I have no idea why a circle wouldn't work, but I wasn't going to mess with Joy. The overlapping folds kept the pocket closed despite steam building up a bit inside. Parchment works better than foil because it keeps in just enough steam, but lets some out too.

Only 15 minutes in the toaster oven and all set. This was yummy, especially for fish. The name sounds so fancy, you'd never imagine a full dinner could be on the table in a half hour. Lest you think I've gone to the dark side, I served this with Annie's Mac & Cheese and some stir fried cauliflower (Yes, it's purple. CSA veggies come in some interesting colors).